Summary :
Nginx is a high performance web server software. It is a much more flexible and lightweight program compare to Apache web Server. This article show how to install and configure nginx with external haproxy load balancer
Environment :
Server IP Role
nginx-node1 10.152.0.25 nginx
nginx-node1 10.152.0.26 nginx
nginx-loadbalancer 10.152.0.27 load balancer
Install and Configure nginx on Centos 7
To add the CentOS 7 EPEL repository, open terminal and use the following command:
#
yum install epel-release

Install Nginx using the following yum command:
# yum install nginx
To get Nginx running, type:# systemctl start nginx# systemctl enable nginxTo allow HTTP and HTTPS traffic:# firewall-cmd --permanent --zone=public --add-service=http
# firewall-cmd --permanent --zone=public --add-service=https
# firewall-cmd --reload 
Verify nginx running on http using public ip:
Create an SSL Certificate on Nginx for CentOS 7 Note: This step not required if you are using HA Proxy configured with SSL certificate. TLS, and its predecessor SSL are web protocols used to wrap normal traffic in a protected, encrypted wrapper. By enabling this, servers can send traffic safely between the server and the client without the concern that the messages will be intercepted and read by an external party. create a new directory to store our private key:
# mkdir /etc/nginx/ssl
Files must be kept strictly private, we will modify the permissions to make sure only the root user has access:
# chmod 700 /etc/nginx/ssl Create the SSL key and certificate files with openssl:
# openssl req -x509 -nodes -days 365 -newkey rsa:2048 -keyout /etc/nginx/ssl/nginx-selfsigned.key -out /etc/nginx/ssl/nginx-selfsigned.crt
openssl: This is the basic command line tool for creating and managing OpenSSL certificates, keys, and other files.req -x509: This specifies that we want to use X.509 certificate signing request (CSR) management. The "X.509" is a public key infrastructure standard that SSL and TLS adhere to for key and certificate management.-nodes: This tells OpenSSL to skip the option to secure our certificate with a passphrase. We need Apache to be able to read the file, without user intervention, when the server starts up. A passphrase would prevent this from happening, since we would have to enter it after every restart.-days 365: This option sets the length of time that the certificate will be considered valid. We set it for one year here.-newkey rsa:2048: This specifies that we want to generate a new certificate and a new key at the same time. We did not create the key that is required to sign the certificate in a previous step, so we need to create it along with the certificate. The rsa:2048 portion tells it to make an RSA key that is 2048 bits long.-keyout: This line tells OpenSSL where to place the generated private key file that we are creating.-out: This tells OpenSSL where to place the certificate that we are creating.


While we are using OpenSSL, we should also create a strong Diffie-Hellman group, which is used in negotiating Perfect Forward Secrecy with clients.

# openssl dhparam -out /etc/ssl/certs/dhparam.pem 2048

# cat /etc/ssl/certs/dhparam.pem | sudo tee -a /etc/nginx/ssl/nginx-selfsigned.crt
Configure nginx.conf to use certificates: # For more information on configuration, see:
# * Official English Documentation: http://nginx.org/en/docs/
# * Official Russian Documentation: http://nginx.org/ru/docs/
user nginx;
worker_processes auto;
error_log /var/log/nginx/error.log;
pid /run/nginx.pid;
# Load dynamic modules. See /usr/share/nginx/README.dynamic.
include /usr/share/nginx/modules/*.conf;
events {
worker_connections 1024;
}
http {
log_format main '$remote_addr - $remote_user [$time_local] "$request" '
'$status $body_bytes_sent "$http_referer" '
'"$http_user_agent" "$http_x_forwarded_for"';
access_log /var/log/nginx/access.log main;
sendfile on;
tcp_nopush on;
tcp_nodelay on;
keepalive_timeout 65;
types_hash_max_size 2048;
include /etc/nginx/mime.types;
default_type application/octet-stream;
# Load modular configuration files from the /etc/nginx/conf.d directory.
# See http://nginx.org/en/docs/ngx_core_module.html#include
# for more information.
include /etc/nginx/conf.d/*.conf;
server {
listen 80 default_server;
listen [::]:80 default_server;
listen 443 ssl http2 default_server;
listen [::]:443 ssl http2 default_server;
server_name _;
root /usr/share/nginx/html;
ssl_certificate "/etc/nginx/ssl/nginx-selfsigned.crt";
ssl_certificate_key "/etc/nginx/ssl/nginx-selfsigned.key";
ssl_session_cache shared:SSL:1m;
ssl_session_timeout 10m;
ssl_ciphers HIGH:!aNULL:!MD5;
ssl_prefer_server_ciphers on;
# Load configuration files for the default server block.
include /etc/nginx/default.d/*.conf;
location / {
}
error_page 404 /404.html;
location = /40x.html {
}
error_page 500 502 503 504 /50x.html;
location = /50x.html {
}
}
} Check nginx.conf syntax:
nginx -t
Reload nginx service:
systemctl reload nginx 
Verify nginx running on https using public ip: 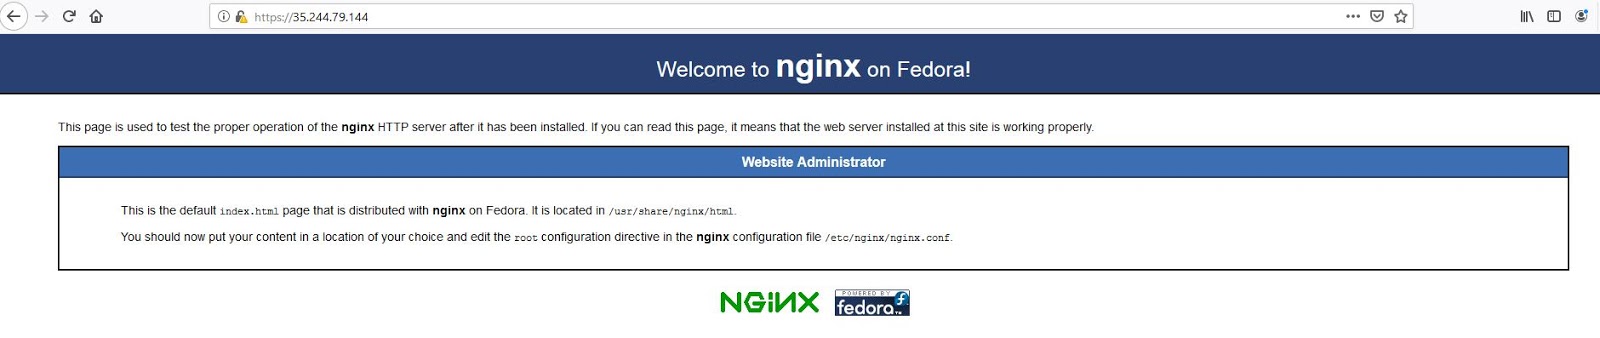
Install HAProxy :

# yum install haproxy -y
Start haproxy service : # systemctl enable haproxy# systemctl start haproxyAllow firewall rule for haproxy :firewall-cmd --permanent --zone=public --add-service=httpfirewall-cmd --permanent --zone=public --add-service=httpsfirewall-cmd --permanent --zone=public --add-port=8181/tcp
firewall-cmd --reload 
Add host entries on /etc/hosts :# vim /etc/hosts 10.152.0.25 nginx-node110.152.0.26 nginx-node2Create a new directory to store our private key :
# mkdir /etc/haproxy/ssl
Files must be kept strictly private, we will modify the permissions to make sure only the root user has access:
# chmod 700 /etc/haproxy/ssl Create the SSL key and certificate files with openssl:
#
openssl req -x509 -nodes -days 365 -newkey rsa:2048 -keyout
/etc/haproxy/ssl/haproxy-selfsigned.key -out
/etc/haproxy/ssl/haproxy-selfsigned.crt While
we are using OpenSSL, we should also create a strong Diffie-Hellman
group, which is used in negotiating Perfect Forward Secrecy with
clients.
# openssl dhparam -out /etc/ssl/certs/dhparam.pem 2048
# cat /etc/ssl/certs/dhparam.pem /etc/haproxy/ssl/haproxy-selfsigned.crt /etc/haproxy/ssl/haproxy-selfsigned.key > /etc/haproxy/ssl/haproxy-selfsigned-crt-key.pem Configure haproxy.cfg :# vim /etc/haproxy/haproxy.cfg global
log 127.0.0.1 local0
maxconn 4000
daemon
uid 99
gid 99
defaults
log global
mode http
option httplog
option dontlognull
timeout server 5s
timeout connect 5s
timeout client 5s
stats enable
stats refresh 10s
stats uri /haproxy?stats
frontend https_frontend
bind *:80
bind *:443 ssl crt /etc/haproxy/ssl/haproxy-selfsigned-crt-key.pem
mode http
option httpclose
option forwardfor
reqadd X-Forwarded-Proto:\ https
default_backend web_server
backend web_server
mode http
balance roundrobin
cookie SERVERID insert indirect nocache
server ngnix-node1 10.152.0.25:80 check cookie nginx-node1
server ngnix-node2 10.152.0.26:80 check cookie nginx-node2
Verify HA Proxy statistics :
Verify nginx running on HA Proxy load balancer via https using public ip: